This document applies to the following user roles within Omnia:Account Administrator
Partner Administrator
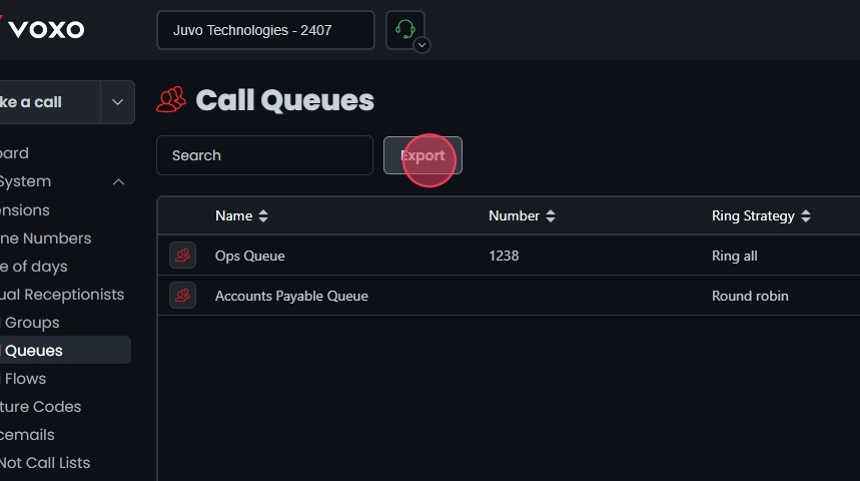
Accessing Call Queues
- Navigate to Call Queues:
Go to the Admin Portal and sign in.
Click the Phone System tab to expand it, then select Call Queues.

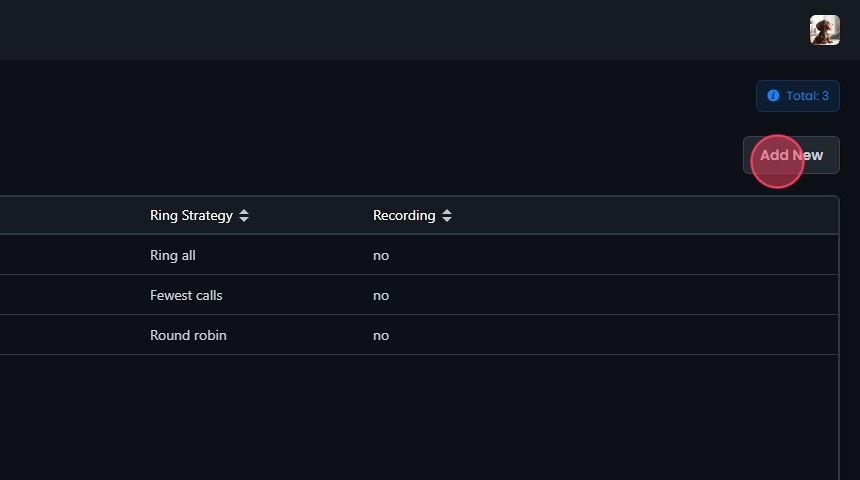
Adding a new Call Queue
- Add a Call Queue:
- Click on the Add New button.
- Fill in the required details under the General tab.
Configuring Call Queues
- General Settings:
- Enable recording: Check this box to enable call recording.
- Name: Provide a name for the call queue.
- Number: Assign a unique number to the call queue.
- Select ring strategy: Choose a ring strategy from the dropdown list:
- Fewest calls: Rings the agent with the fewest answered calls.
- Linear: Rings agents in a fixed order.
- Random: Rings agents in a random order.
- Ring all: Rings all agents simultaneously.
- Round robin: Rings agents in a circular order.
- Timeout (seconds): Set the duration after which the call will timeout.
- Branch (Optional): Select the branch associated with this queue.
- Select max queue length: Set the maximum number of callers waiting in the queue.

Timeout and Queue Full Destinations
- Configure Destinations:
- Timeout destinations: Select the destination type and specific destination for calls that timeout.
- If queue is full: Select the destination type and specific destination for calls when the queue is full.
- Add a destination: Click to configure multiple destinations. Note that this button will only appear based on the selected destination type.
- Reorder: Use to reorder destinations by clicking and dragging.
- Delete: Click to remove a destination.

Configuring Conditional Routing
- Enable Redirecting Call if No Agents are Available:
- Enable redirecting call if no agents are available: Check this box to enable redirection when no agents are available to service a call.
- If no agents are available: Select the destination type and specific destination.
- Destination Type: Choose from options like Voicemail, Call Group, Another Queue, etc.
- Specific Destination: Enter or select the specific destination based on the type chosen.

- Enable Redirecting Call if All Agents are Busy:
- Enable redirecting call if all agents are busy: Check this box to enable redirection when all agents are busy.
- If all agents are busy: Select the destination type and specific destination.
- Destination Type: Choose from options like Voicemail, Call Flow, Another Queue, etc.
- Specific Destination: Enter or select the specific destination based on the type chosen.

Abandoned Call Notifications
- Enable Notifications:
- Enable abandoned call notifications: Check this box to receive notifications.
- Notify abandon email: Enter the email address to receive notifications.

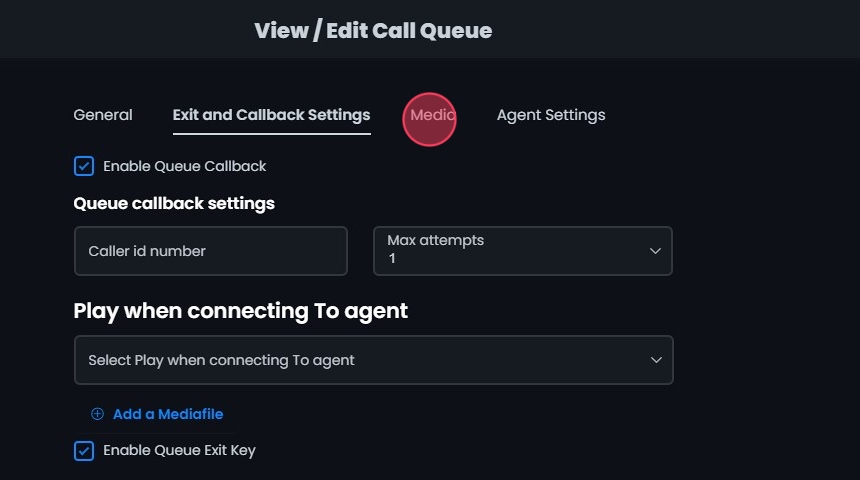
Exit and Callback Settings
- Open Exit and Callback Settings:
Click the Exit and Callback Settings tab to open the settings for the call queue.
Check the box to enable queue callback.

- Queue Callback Settings:
- Caller ID number: Choose the number from the dropdown that will appear as the caller ID.
- Max attempts: Set the maximum number of callback attempts.

Play When Connecting to Agent
- Play When Connecting to Agent:
- Configure media settings to play a specific message when connecting a caller to an agent.
- Use the dropdown to pick from an existing media file or record a new one.
- Click the Preview media button to listen and preview the message.
- Click X to remove the selected message.

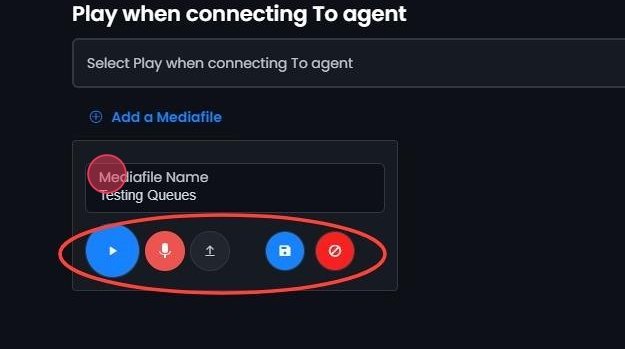
- Add a New Media File:
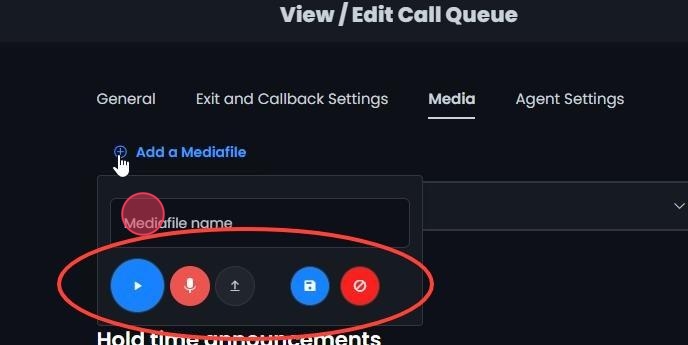
- Click Add a Mediafile to record or upload a new media file if needed.
- Use the controls to record or upload the media file. This will open additional options.

- Additional Options:
- Playback: Click to play the media file.
- Press and Hold To Record: Click and hold to record a message.
- Upload File: Click to add an existing audio file.
- Cancel Changes: Click revert to previous settings.
- Enter a name: Type the name in the Mediafile Name field before saving.
- Save Changes: Click to save the recorded or uploaded file. This media file will now be available to choose from and select in the dropdowns.
Enabling and Configuring Exit Key
- Enabling and Configuring Exit Key:
- Enable Queue Exit Key: Check the box labeled Enable Queue Exit Key.
- Select Exit Key: Under Exit key settings, click the dropdown menu labeled Exit key.
- Select the desired exit key from the available options (0-9).

Configuring Exit Key Destination
- Configure Exit Key Destination:
- After selecting the exit key, configure the destination for calls that use the exit key.
- Destination Type: Choose from options like Voicemail, Custom, Another Queue, etc.
- Specific Destination: Enter or select the specific destination based on the type chosen.

- Access Media Tab:
- Click the Media tab to open the media settings for the call queue.
- Add a Media File:
- Click Add a Mediafile to record or upload a new media file if needed. Use the controls to record or upload the media file. This will open additional options.

- Additional Options:
- Playback: Click to play the media file.
- Press and Hold To Record: Click and hold to record a message.
- Upload File: Click to add an existing audio file.
- Cancel Changes: Click to revert to previous settings.
- Enter a name: Type the name in the Mediafile name field before saving.
- Save Changes: Click to save the recorded or uploaded file. This media file will now be available to choose from and select in the dropdowns.
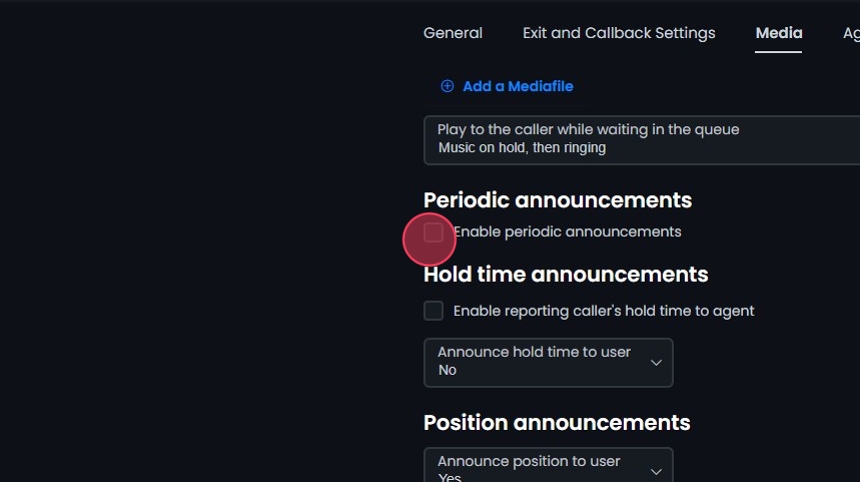
- Play to the caller while waiting in the queue:
- Use the dropdown menu to select what will be played to the caller while they are waiting in the queue.
- Options:
- Music on hold: Plays music while the caller waits.
- Ringing: Plays a ringing sound while the caller waits.
- Music on hold, then ringing: Plays music initially and then switches to a ringing sound.

Setting Up Periodic Announcements
- Enable periodic announcements:
- Check the box labeled Enable periodic announcements.
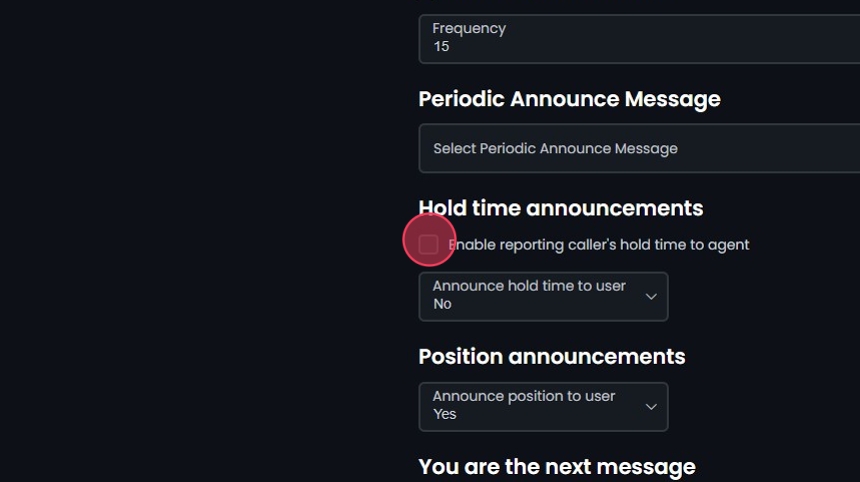
- Set Frequency:
- Use the dropdown menu next to Frequency to select how often the announcements should be made.

- Select Periodic Announce Message:
- Click on the dropdown menu under Periodic Announce Message and choose the message you want to be periodically announced.
- Click the Previewmedia button to listen and preview the message, or click X to remove.

Hold Time Announcements
- Enable reporting caller’s hold time to agent:
- Check the box labeled Enable reporting caller’s hold time to agent.
-
- Announce hold time to user:
- Use the dropdown menu next to Announce hold time to user to select whether and how the hold time should be announced to the caller.
- Options:
- No: Do not announce hold time to the caller.
- Yes: Announce hold time to the caller continuously.
- Once: Announce hold time to the caller once.

- Select Estimated Hold Time Message:
- If you select Yes or Once for announcing hold time to the user, the Est hold time message option becomes available.
- Click on the dropdown menu under Est hold time message and choose the message to be announced regarding the estimated hold time.
- Click the Previewmedia button to listen and preview the message, or click X to remove.

Setting Up Position Announcements
- Announce position:
- Use the dropdown menu next to Announce position to select whether and how the caller’s position in the queue should be announced.
- Options:
- No: Do not announce the position.
- Yes: Announce the position.
- If less than: Announce the position if it is less than a specified number. Enter limit in the enter limit field.
- No more than: Announce the position if it is no more than a specified number. Enter limit in the enter limit field.

- Position Announcement Messages:
- You are the next message:
- Select the message to be announced when the caller is next in line.
- There are message:
- Select the message to be announced when there are other callers ahead in the queue.
- Calls waiting message:
- Select the message to be announced when there are multiple calls waiting.
- Thank you message:
- Select the thank you message to be played to the caller.
- Click the Previewmedia button to listen and preview the messages, or click X to remove.

- Hold and position announcement frequency:
- Use the dropdown menu next to Announce frequency to select how often the hold and position announcements should be made.
- Options:
- 0: No announcements.
- Other values: Frequency in minutes (e.g., 5, 10, 15).

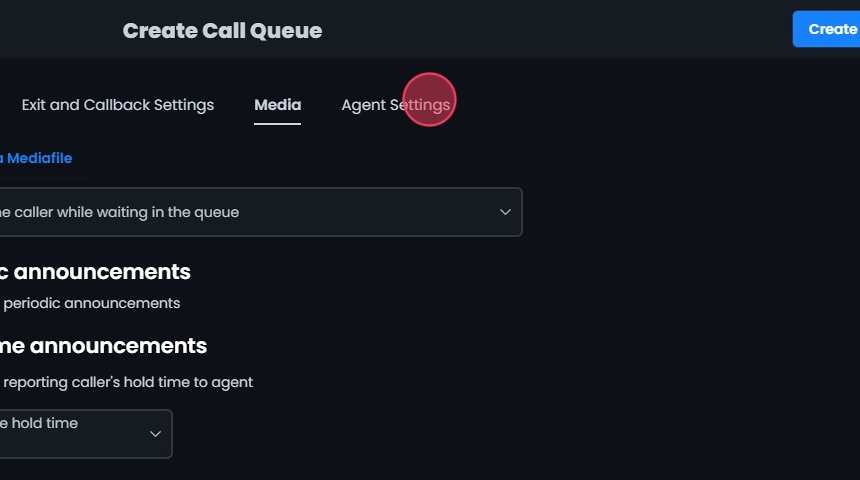
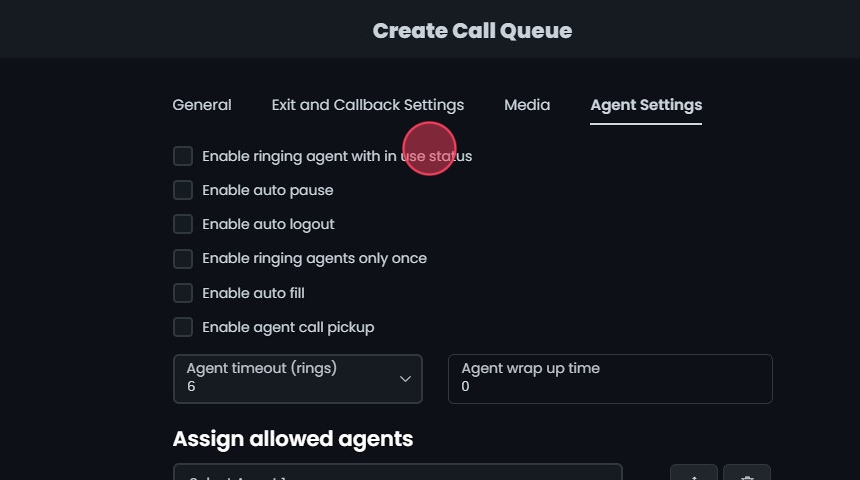
Agent Settings
- Access Agent Settings:
- Click the Agent Settings tab to open the agent settings for the call queue.
- Enable ringing agent with in use status:
- Check the box labeled Enable ringing agent with in use status.
- Allows agents to receive calls even when their status is “in use.”
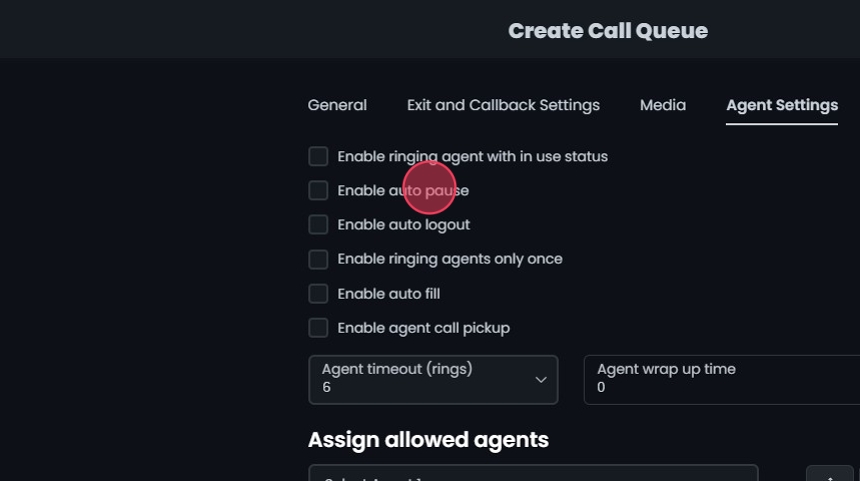
- Enable auto pause
- Check the box labeled Enable auto pause.
- Automatically pauses agents after a call to give them time to wrap up.
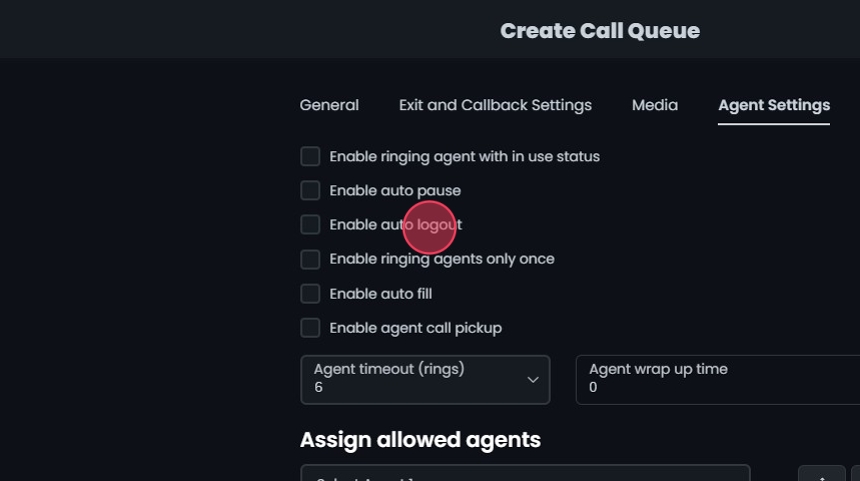
- Enable auto logout:
- Check the box labeled Enable auto logout.
- Automatically logs out agents after a specified period of inactivity.
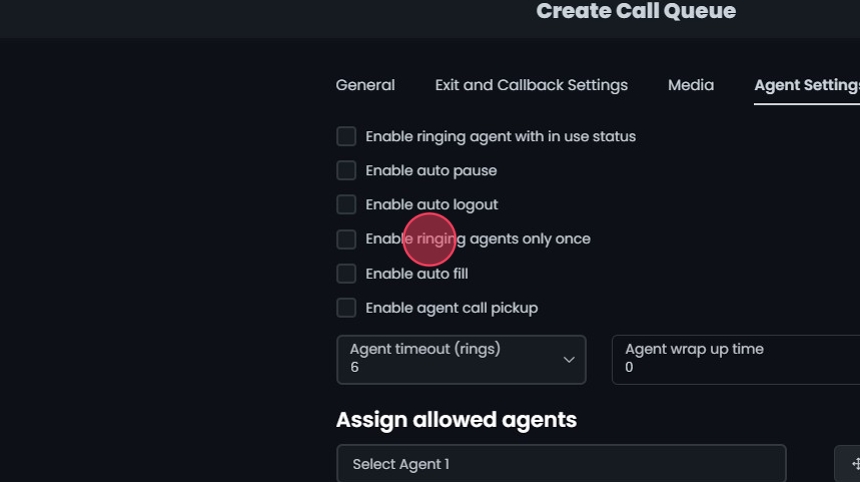
- Enable ringing agents only once:
- Check the box labeled Enable ringing agents only once.
- Rings each agent only once for a call.
- Enable auto fill:
- Check the box labeled Enable auto fill.
- Automatically assigns available agents to calls.
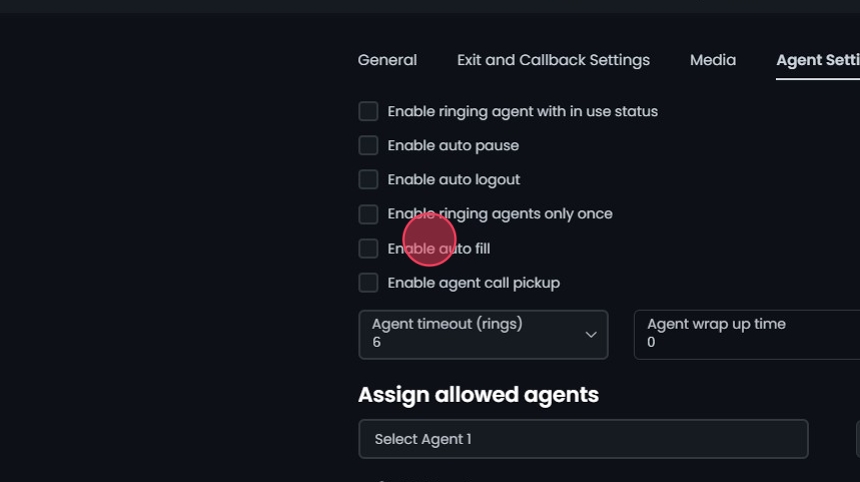
- Enable agent call pickup:
- Check the box labeled Enable agent call pickup.
- Allows agents to pick up calls from other agents.
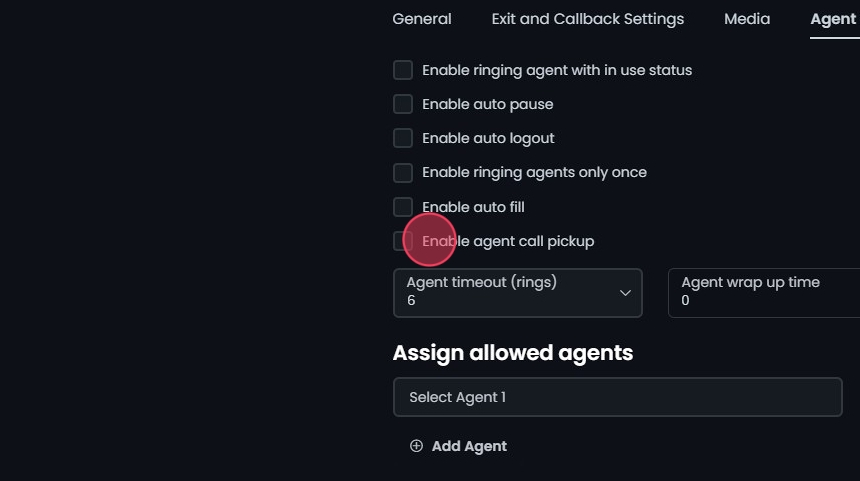
- Set Agent Timeout (rings):
- Use the dropdown menu next to Agent timeout (rings) to select the number of rings before timeout.
- Options: Various options (e.g., 6 rings).
- Defines how many rings before the call is redirected.
Set Agent Wrap Up Time:
- Enter the desired time in the Agent wrap up time field (in seconds).

Assign Allowed Agents
- Assign Allowed Agents:
- Click on the dropdown menu under Assign allowed agents to select agents to be assigned to this queue.
- Click Add Agent to include additional agents.
- Order of Destinations: If using the “Linear” or “Round Robin” ring strategies, ensure that the order of the agents reflects the desired call routing sequence.
- Reorder: Click and drag to change the order of the items in the list.
- Remove Agent: Click to remove an agent from the list.

Create and Save
- Create and Save
- Click Create and then Yes to confirm and save the Call Queue.

Editing Existing Call Queues
- Edit an Existing Call Queues:
- Click on the call queue you want to edit or click the Edit button next to it.
- Make your edits.
- Click Save.
- Click Yes to confirm and save your changes.

Deleting a Call Queue
- Delete a Call Queue:
- Click Delete next to the Call Queue.
- Click Yes to confirm the deletion.

Search and Sort
- Search for a Call Queue:
- Search Bar: Quickly find specific items by typing the name or a keyword in the search field. The system will filter the list based on your search input, displaying the relevant results.
- Sort: Click the sort icons next to the column headers to arrange items in ascending or descending order.

Exporting Call Queues
- Export:
- Export Button: Click the Export button next to the search field.
- The system will download a list of the items in CSV format.